- Depending on your settings:
- Right-click Setup.exe when you can choose between 'Setup.exe' and 'Setup.exe.config'.
- Right-klick Setup when you can choose between 'Setup' and 'Setup.exe'.
Then click Run as administrator to run the MS SQL Server setup with elevated privileges. Allow the application to modify your register.
- Click Installation in the left-hand pane.
- Click New installation or add features to an existing installation. in the right-hand pane.
- Click OK.
- Enter your product key, or use the product key of the installation software, then click Next.
- Activate the I accept the license terms field and ten click Next.
- Click Install (this might be a time-consuming step).
- Click Next. For servers, also configurate the firewall (please refer to http://msdn.microsoft.com/en-us/library/cc646023.aspx).
- Activate SQL Server Feature Installation and then click Next.
- Activate Database Engine Services, SQL Server Books Online and Management Tools – Complete, and then click Next.
- Click Next.
- Activate Named instance, type a name for your MS SQL Server instance in the Instance ID field and then click Next.
- Click Next.
- For SQL Server Agent select Automatic and click Use the same account for all SQL Server Services. Select the account you want to use for running the services, for instance, the local system account.
In a high security environment, the SQL Server Browser service should be turned off. Furthermore, a separate account should be created for every service. If your organization uses log shipping, for instance, an account that has write access to another server is needed. However, system administration issues fall outside the scope of this document.
- Click OK.
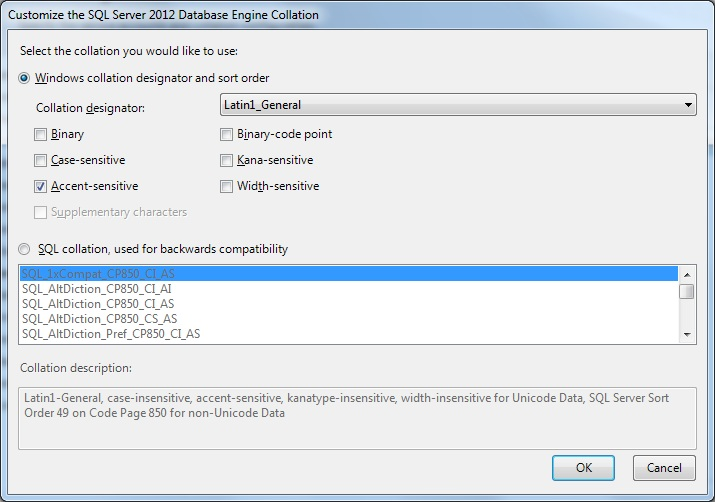
- On the Collation tab, click Customize and select another collation if it is not Latin1_General_CI_AS (SQL_Latin1_General is a backwards compatibility collatation), then click Next.
- Activate Windows collation designator and sort order, in the Collation designator field select 'Latin1_General’ (Western European characters), activate Accent Sensitive and click OK.
In the Server Configuration form the collation name is automatically changed to ‘Latin1_General_CI_AS’ (Case-Insensitive, Accent-Sensitive).
- Click Next.
- Activate Mixed Mode (SQL Server authentication mode and Windows authentication), enter a password for the administrator in the Enter password and Confirm passwords field, and add an administrator in the Specify SQL Server administrators list in one of the following ways:
- Click Add Current User to add the current user as an administrator, or
- Click Add and select an administrator.
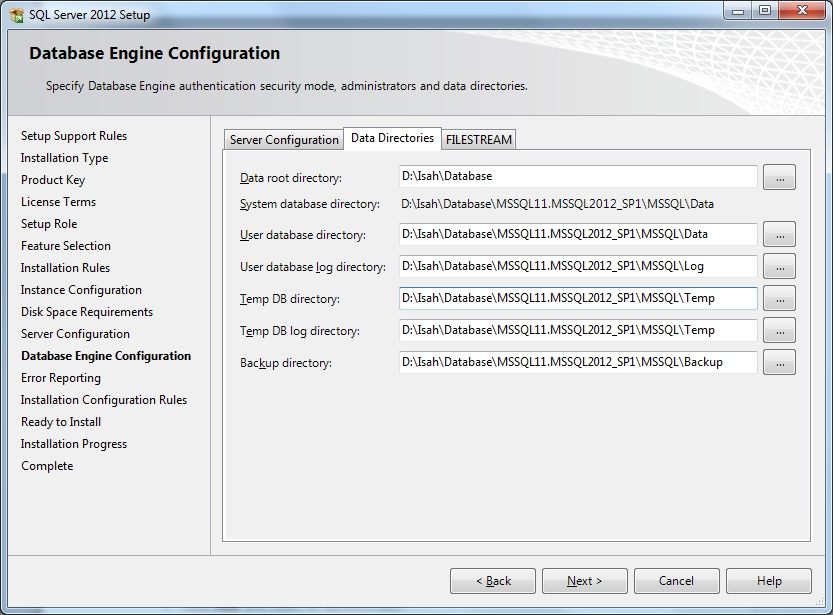
- Click the Data Directories tab. Enter the standard Isah paths as shown below. Note: change 'MSSQLSERVER_ISAH' to your instance name.
For higher performance, log and data directories should be placed on separate disks with a separate IO channel. Small systems might not have a D drive. In that case, use C instead. However, hardware configuration is a system administrator issue that falls outside the scope of this document. Apart from the drive, we strongly recommend to use the paths as suggested in this document.
- Then click Next.
- Click Next.
- Click Next.
- Click Install. Please wait until the installation is complete.
- Click Close.
- Close the SQL Server Installation Centre form.