 56. Generate the CREATE INDEX script
Click the Generate script button to generate the Create_IDXs.sql script with which all indexes will be created. The script is automatically saved for later use.
Run the Generate_Drop_IDXs.sql script shown on the MS SQL database.
 58. Delete the Identity columns
Run the T_ProjectLineCostBudgetLog_Before.sql script shown on the MS SQL database.
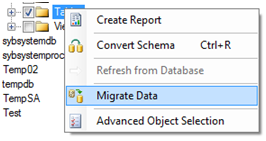
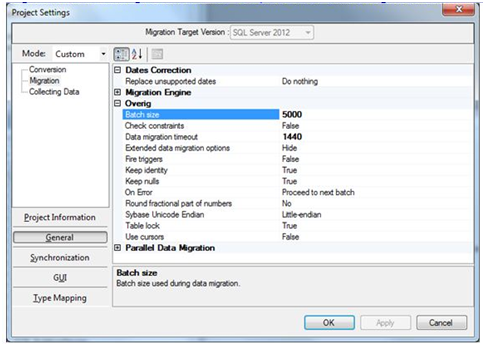
If the data of some tables are not migrated or only partly migrated because of a timeout error:
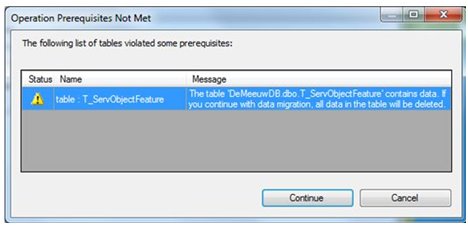
 60. Save the data migration report
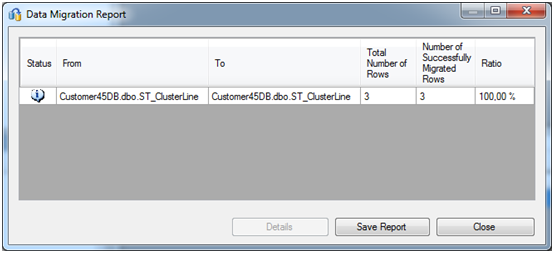
Following the data migration, create a report containing the results in the SSMA tool:
 61. Create Identity columns for standard tables
Run the T_ProjectLineCostBudgetLog_After.sql script shown on the MS SQL database.
Click the Run button to check the data migration. For every table, the number of records in the Sybase database is compared with the number of records in the MS SQL database. Any differences are logged. A list of all tables and the number of records are saved in the TablesRecordCount.log file.
If any of the tables have not been migrated correctly, you can use the scripts in the Data_Repair folder to:
After this, use the SSMA tool to transfer the contents of the failed tables only.
Warning: Do not forget to modify the WHERE clause in script 03. Otherwise, all tables will be cleared.
Alternatively, you can use the method described in step 59: Migrate the data.
 63. Create Identity columns for custom tables
IdentityTables.sql script that was generated earlier is now displayed. 64. Run the CREATE INDEX script
The Create_IDXs.sql script that was created earlier is shown. Run this script.
Run the Save_IsahData.sql script.
 66. Apply the latest patch to the database
For large databases, set the transaction log to ´Unrestricted File Growth´ and check the Enable Autogrowth checkbox: right-click on Database, Properties, Files, Log file.
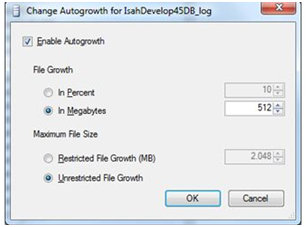
After applying the patch, you can shrink the log again.
Run the Check_Structure_MSSQL.sql script to check if all customizations still exist.
Any missing objects and tables with incorrect column definitions are reported. Do not forget to check the Output tab, since since the results of the import check are reported there.
As a consequence of the unicode conversion for version 4.5, some user passwords will be corrupted after the data migration of the Isah database. You can use the procedure below to restore these passwords.
After the test migration, prompt all users to log into Isah. If users cannot log in, reset their passwords to what it used to be in version 4.0.
To log into Isah without an Isah password
Example
Database: ProductionDB
Name: sa>John
During the production migration (after the data migration) copy the 4.5 passwords from the test migration environment to your production environment. You can use the statement below.
UPDATE [ProductionDB].dbo.T_UserRegistration
SET UserPassWord = T.UserPassword
FROM [TestDB].dbo.T_UserRegistration AS T
WHERE T.UserCode = [ProductionDB].dbo.T_UserRegistration.UserCode;
In the above statement, use the name of your production database instead of [ProductionDB] (2×) and the name of your test migration environment instead of [TestDB].
Make sure that users do not change their passwords in the 4.0 production environment after the test migration has been performed. If you use the procedure above, after the production migration, every user will have the unicode version of their password as it was prior to the test migration. Users newly added to the 4.0 production environment after the test migration has been performed, might not be able to log in after the production migration. You have to reset their password in the production environment.