The Isah interface has a number of toolbars and information or status bars. Not all of these bars are visible throughout the Isah software.
Information or status bars are merely informational in nature, while toolbars contain icons grouped by function. An example of an information or status bar is the Record bar, which shows brief information about the selected record. An example of a toolbar is the Reports toolbar, which includes icons that give you access to the Print preview, Excel, and pivot table functionalities.
When you hover the mouse over an icon, the name of the icon will appear.
Toolbars and information or status bars can be enabled and disabled from the View menu.
The List toolbar has the following icons and fields:
Go to first record
Go to previous record
Go to next record
Go to last record
Select the column you want to sort the records on (you can also click the column).
This field is associated with the sorting field. Type data in this field to search within the sorting.
Show the grouping box to which you drag the columns to sort on.
Activate the filter form.
Activate the AutoFilter to display a list box above each column in which you can select items.
When the filter row is active, a field is displayed above each column by which data are filtered as you type.
First select records using the mouse button, the SHIFT+mouse button, or the CTRL+mouse button, and then click this icon to display only the selected records.
Use this function to apply formatting to the filtered records. For example, you could display all sales orders for which deliveries are required in the next two weeks in red.
The Preset toolbar only contains the preset selection window:
A preset displays a particular selection of data. It is a user-dependent, predefined filter on the List tab of various forms. On many forms, you can choose from several default presets, or you can manually define multiple presets for each form. To create you own presets, some knowledge of SQL is required.
You could use a preset, for example, for the Parts form in the Parts module. Whereas this form usually contains a great many records, your work may involve only a small number of parts. If that is the case, you can use a preset to specify the parts that are relevant to you. By activating this preset from within the Parts form, the form will only display those parts that meet the conditions of your preset.
The next time you open the Parts form, it will show only the parts specified by the preset you used last. To see another selection, select another preset.
Presets are faster than filters, as filters are applied on the client (the workstation itself), whereas presets are dealt with on the server. When using filters, all data are retrieved from the server, and the filtering process takes place on the client computer. If you are using presets, the data are filtered on the server, and only the filter results are displayed on your screen.
Note: Before users can use default presets, each user or user group must first be given rights to the default presets.
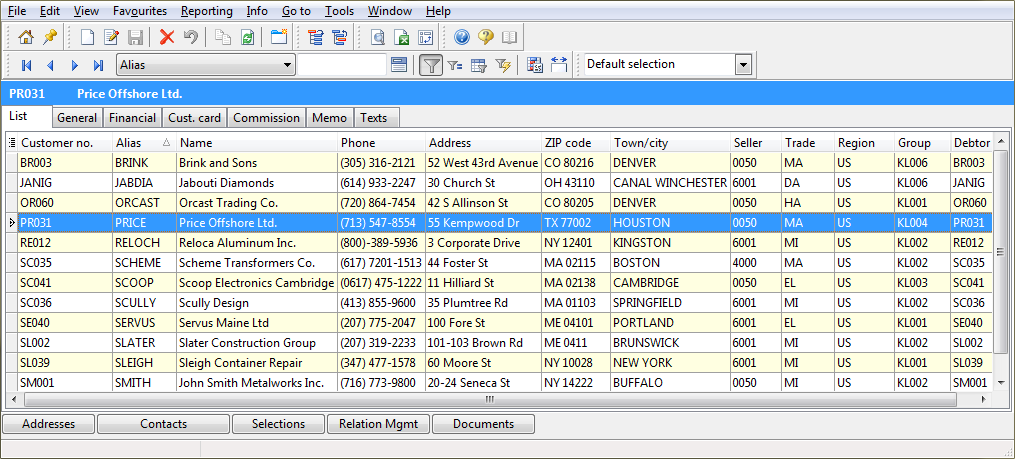
The Record bar shows information about the record selected in the file. In the example below, the bar is blue with white letters, and contains the text 'PR031 Price Offshore Ltd.'.
The Status bar shows short explanations, where applicable. For example, if you hold the cursor over an icon for a few seconds, this bar displays a short explanation of the icon.
The Status bar is located at the very bottom of the form:
 General