Highlighting lines or cells using conditional formatting
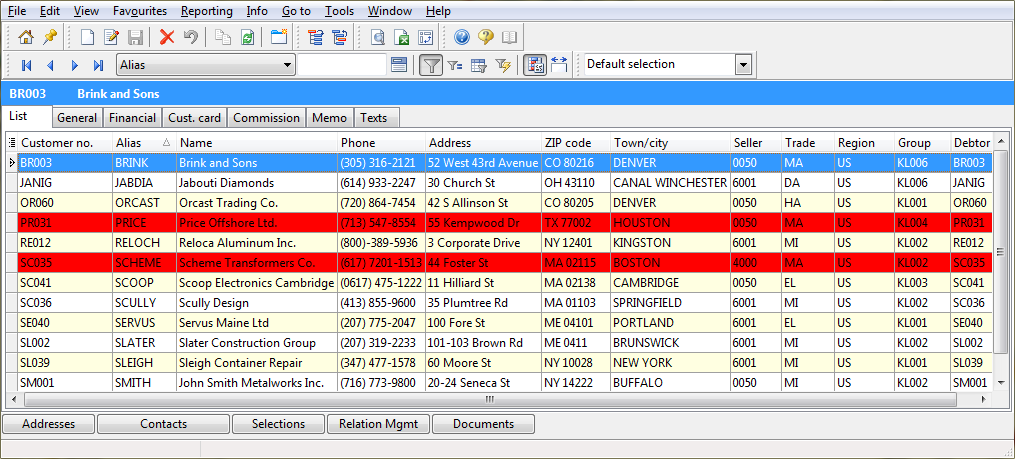
Sometimes it is more practical to highlight the most important data on the List tab by using prominent formatting. To highlight lines or cells that meet certain conditions, use the Conditional formatting feature.Using this feature, you could, for example, display the lines for all customers from New York in red. For information on applying conditional formatting, see the List and column functions video.
The formatting definitions determining which cells or rows will be highlighted are saved by preset and by user.
Using existing formatting or defining new formatting
To highlight rows in a list, you can:
Select one existing formatting definition. To use just one formatting definition, click next to the Conditional formatting icon . Activate the formatting definition of your choice.
Select multiple existing formatting definitions. To use more than one formatting definition, click the Conditional Formatting icon . Activate the formatting definitions of your choice. If different formatting definitions apply to a single cell or row, the bottom-most formatting definition is displayed. You can reorder the formatting definitions using the and icons.
Create a formatting definition to be used once. To highlight particular data in the list just once, click and select the 'Default' formatting definition that is always available. In the Conditions section, define the conditions the highlighted cells or rows must meet. Use the other fields to define how highlighted data should appear. The highlight will remain active as long as the form is open. The formatting definition is not saved for future use.
Create a formatting definition to be saved for future use. To be able to reuse a formatting definition at a later time, click , and then click to create a new formatting definition. Specify a name for the formatting definition. In the Conditions section, define the conditions the highlighted cells or rows must meet. Use the other fields to define how highlighted data should appear. You can create multiple formatting definitions. Later you will be able to apply one or more formatting definitions to the list (see above).
Possible actions
Formatting definitions can be:
Created using . You need to specify the conditions and the formatting.
Changed using . This allows you to change the formatting name. If you try to rename the 'Default' formatting definition, the conditions and formatting will be copied to a new formatting definition with a name you can specify. It is not possible to rename the 'Default' formatting definition itself.
Copied using . This will copy the conditions and formatting to a new formatting definition. You need to specify a name for the new definition.
Deleted using .
Saved as a filter using . The lines that meet the specified conditions will not be marked, but will be the only lines displayed on the form. Any lines that do not meet the conditions will be hidden.
You can copy formatting definitions to another user. To let another employee use your formatting definition, use the Copy user settings process.
You can apply conditional formatting whenever you want to highlight data on the List tab. You could, for example, highlight all customers based in Chicago (Town/city equals Chicago).
Other examples include:
Statuses: You could display all sales lines with an 'Order' status type (Status type equals Order) in green, and display the cells with a status between 30 and 40 in all production files (Status is greater than or equal to 30 AND Status is less than 40) in blue.
Sums: On the Purchase list form, you could display the cells with commitments exceeding $ 1,000 in yellow (Commitment is greater than 1000).
Dates: On the Purchase list form, you could have the dates displayed in bold and underlined for all purchase orders with a receipt date in the past (Original receipt date is less than <Current date>).
Similarly, you can choose to highlight authorized, released, finalized or obsolete lines.
 Examples